By Charlotte Lowrie
Photography Tip #1
Making portraits. When you’re making a portrait, try these techniques:
• For adults, keep the subject’s eyes in the top third of the frame.
• Always focus on the subject’s eyes, but set the exposure for the subject’s skin.
• Use a short telephoto lens in the 85 to 200mm range.
• To enhance a shallow depth of field, shoot at a wide aperture from f/5.6 to f/2.8 or wider, use a telephoto lens or zoom setting, and move the subject several feet or more from the background. These techniques will make almost any background suitable for portraits.
 Photography Tip #2
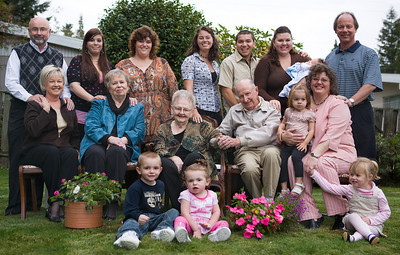
Photographing groups of people. Arranging groups of five or more people for a group photo can be a challenge. Try this advice from a sage photography instructor. Arrange people as you would arrange a bouquet of flowers. First, place one person in the scene, then another, and another, evaluating the arrangement as you work. Then you can create a connection among the subjects—and create eye direction for the viewer—by having people lean toward others in the group, and by having people place their hand or arm on or around another person’s shoulder. You can also create sub-groups within the larger group to show relationships among the people.
 Photography Tip #3
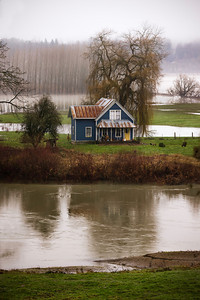
Capture the story. Whether you’re shooting the aftermath of a storm or a new baby with a grandparent, look for every opportunity to tell the story of the subject or scene. For example, ask yourself how the current weather is affecting various people in your area. In this image, the Seattle, WA area had experienced record flooding that washed out most farmers and their fields. The lone farmhouse sandwiched between a swollen river and a water-soaked field tells part of the story of the storm. It’s even better if you can add a fine-art touch to the image by emphasizing the stark conditions, or using selective focus to bring the eye immediately to a telling part of the scene, such as a water-soaked hymnal lying in the mud of a flooded church.
Photography Tip #4
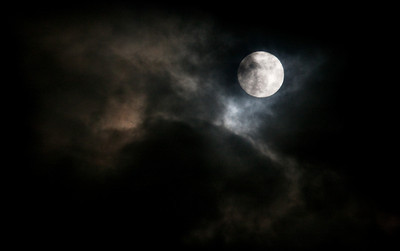
Shoot the moon. To determine the exposure to use to photograph the full moon that is high in the sky on a clear night, use the Lunar 11 Rule. This rule states that the moon can be exposed at f/11 with a shutter speed of 1/[ISO].
 Thus, if you were shooting at ISO 200, then the exposure would be f/11 at 1/200th sec. As the moon phases change to gibbous, to quarter to crescent, the moon requires more exposure, approximately a full f-stop more exposure for every 1/8-illumination change in the moon. If you don’t want to shoot at f/11, you can use equivalent exposures to calculate alternate exposure settings. For tack-sharp focus, mount the camera on a tripod and use the self-timer mode to fire the shutter.
Photography Tip #5
Shoot, Delete, Shoot Again. Someone once commented that the difference between a professional and an amateur is the size of his or her trashcan. Evaluate the light, evaluate the subject, work all the possible angles, evaluate the right lens for the scene, and then shoot until you get the best possible shot you can get. Walk around the scene or subject to find the best point of view, and don’t be afraid to kneel down, lie down, or use a high vantage point. Then evaluate the image to see if you’ve gotten the best exposure possible in the camera. For example, in this image, I shot more than 250 images to get approximately five pictures that I considered usable.
Related articles:

